Altitude Sickness and Acclimatization on Kilimanjaro

As you embark on the journey to conquer Mount Kilimanjaro, it’s crucial to grasp the concept of altitude sickness and acclimatization. This article will break down these topics, providing insights into their effects and the measures to take for a safe and successful climb.

Altitude and Its Effects

Mount Kilimanjaro, standing at a towering height of 5,895 meters (19,341 feet), presents unique challenges to climbers. Among these challenges, altitude sickness looms as one of the most perilous. An alarming number of individuals experience symptoms related to altitude sickness when ascending beyond 9,000 feet. At Climbing Kilimanjaro, ensuring your safety takes precedence.

Understanding the Impact of Altitude

Kilimanjaro is a favorite trek for many because it offers the opportunity to summit a high peak without requiring specialized climbing skills. This “walk-up” nature might mislead some into underestimating the potential dangers posed by altitude.

The summit of Kilimanjaro falls into the “extreme altitude” category, akin to Aconcagua and Denali. These peaks are surpassed only by “ultra” altitude peaks such as Everest and K2, where the acclimatization process becomes nearly impossible.

Diving into Altitude Science

At Kilimanjaro’s summit, the oxygen available is approximately 49% less than at sea level. However, it’s not the oxygen percentage in the air that changes; rather, it’s the reduction in barometric pressure (air pressure) within the atmosphere.

In simpler terms, even though the oxygen percentage remains at 20.9%, its availability is diminished due to lower air pressure. This scarcity of oxygen molecules can lead to fluid accumulation around the brain (High Altitude Cerebral Edema) and the lungs (High Altitude Pulmonary Edema), which are severe conditions associated with reduced air pressure.

About Altitude Sickness

Altitude sickness comes in three primary forms: Acute Mountain Sickness (AMS), High Altitude Cerebral Edema (HACE), and High Altitude Pulmonary Edema (HAPE). AMS can manifest as mild, moderate, or severe, while HACE and HAPE entail more critical conditions.

Let’s delve deeper into these conditions.

Acute Mountain Sickness (AMS)

AMS can affect anyone above 6,000 feet, as described by Dr. Peter Hackett. The initial sign is often a headache, which can also result from dehydration or overexertion. If other symptoms emerge, a diagnosis of AMS is likely.

  • Mild AMS: Symptoms resemble a hangover, including nausea, headache, fatigue, and appetite loss. Address these symptoms by informing your guide, resting, and staying hydrated.
  • Moderate AMS: Symptoms worsen, leading to persistent headache, dizziness, coughing, shortness of breath, nausea, and vomiting. Descent to a lower elevation is recommended at this stage.
  • Severe AMS: Ignoring moderate AMS can escalate symptoms, causing severe headache, lack of coordination, increased coughing, shortness of breath, and even evacuation from the mountain.

High Altitude Pulmonary Edema (HAPE)

HAPE arises from lung artery pressure elevation in low-oxygen environments, resulting in fluid accumulation around the lungs. Even climbers without severe AMS symptoms can develop HAPE.

Look out for:

  • Coughing up blood or mucus
  • Abnormal lung sounds
  • Extreme listlessness
  • Difficulty breathing
  • Bluish lips
  • Confusion and lack of coordination

High Altitude Cerebral Edema (HACE)

HACE is a critical condition requiring immediate medical attention. Fluid buildup around the brain leads to confusion, lethargy, incoordination, and altered behavior.

Look out for:

  • Disorientation, hallucinations, nonsensical speech
  • Inability to walk properly, staggering
  • Irrational behavior
  • Severe headache, often accompanied by nausea and vomiting

Diagnosis of Altitude Sickness

Our guides use a pulse oximeter and consider your symptoms during daily health checks to evaluate your situation. The Lake Louise Scoring System aids diagnosis, assigning scores based on the severity of symptoms.

Acclimatisation: Your Ally Against Altitude Sickness

Acclimatization refers to the body’s adaptive processes in response to low-oxygen and low-atmospheric pressure environments. From day one, your body initiates changes to cope with altitude.

Changes you’ll experience:

  • Deeper and possibly faster breathing
  • Elevated resting heart rate
  • Potentially higher blood pressure

As you ascend gradually, your body adopts mechanisms to adjust:

  • Increased hemoglobin production for oxygen transport
  • Higher erythropoietin production for more red blood cells
  • Decreased plasma volume, raising dehydration risk
  • Enhanced kidney function to maintain acid-base balance

These adaptations occur gradually, and optimal acclimatization is achieved through routes with robust acclimatization protocols. Longer ascents allow your body ample time to adapt.

Preventing Altitude Sickness: Best Practices

  • Opt for longer routes to build in acclimatization days.
  • Walk slowly (“pole pole” in Swahili) to avoid exhaustion.
  • Conserve energy, even if you’re fit.
  • Stay hydrated to prevent dehydration.
  • Consult your doctor about Diamox.
  • Descend if experiencing altitude sickness symptoms.
  • Avoid alcohol, narcotic painkillers, sleeping pills, and stimulants.
  • Communicate symptoms to your guide.
  • Maintain a carbohydrate-rich diet for high-altitude exertion.
  • Protect yourself from hypothermia by staying dry and wearing layers.
  • Use sunscreen and UV-blocking sunglasses to shield from intense rays.
  • Follow hygiene precautions to prevent gastrointestinal issues.

Prioritize your health, even beyond altitude sickness, by staying warm and practicing good hygiene.

Altitude Training and Health Considerations – Altitude Sickness

Altitude training is growing in popularity among aspiring mountaineers and athletes. Various methods exist, such as simulated altitude chambers and intermittent hypoxic air exposure. While altitude training can improve acclimatization, pre-acclimatization through climbing other peaks or Mt. Meru can be equally effective.

Read more about training for Kilimanjaro.

Existing Medical Conditions and Altitude Effects

Individuals with well-managed pre-existing medical conditions can successfully climb Kilimanjaro, but medical clearance is essential. Precautions are necessary, especially for heart, lung, or neurological conditions. Consult your doctor about medication adjustments and travel insurance coverage.

Effects on Sleep and Other Health Considerations

Altitude can disrupt sleep due to periodic breathing, a battle between the body’s oxygen sensors and carbon dioxide sensors. Adequate layers prevent hypothermia, while sunscreen and sunglasses shield against UV rays. Stomach issues are possible, making hygiene crucial.

Safety Measures Taken By Us

Your safety is paramount. Our guides closely monitor your well-being, but your cooperation is essential. Inform your guide of any discomfort, and observe fellow climbers for unusual behavior. Regular health checks and the availability of oxygen and stretchers ensure your safety during the climb.

As you embark on this monumental journey, understanding altitude sickness and acclimatization equips you with the knowledge to safeguard your health and achieve a successful summit on Mount Kilimanjaro.

Kilimanjaro: Do I Need Supplemental Oxygen to Climb?

When it comes to climbing Mount Kilimanjaro, a common question arises: Is supplemental oxygen necessary for the climb? Let’s understand the role of oxygen and the challenges posed by altitude during this remarkable journey.

Supplementing Oxygen on Kilimanjaro

Altitude is a significant factor to consider when climbing Kilimanjaro. However, climbers do not require extra oxygen to reach the summit successfully. Instead, the “pole pole” method is employed – a gradual ascent to higher altitudes and sleeping at lower levels to acclimatize effectively.

Spending more time on the mountain improves your chances of summiting Kilimanjaro. To prioritize safety, we carry emergency oxygen tanks and medical kits on all our climbs.

Using Supplemental Oxygen: To Do or Not to Do?

It’s essential to note that we do not use bottled oxygen to alleviate low oxygen saturation or breathing difficulties for summiting purposes. This approach can mask underlying issues and lead to altitude-related complications later on. Some tour operators may advertise “personal oxygen systems,” but their usage is discouraged due to potential risks.

The Essence of Climbing Kilimanjaro

Kilimanjaro’s challenge primarily stems from its altitude. While the trek itself isn’t strenuous by hiking standards, altitude adds the real difficulty. The achievement of climbing Kilimanjaro is diminished if supplemental oxygen is used, as the essence lies in conquering its elevation.

Emergency Oxygen Usage

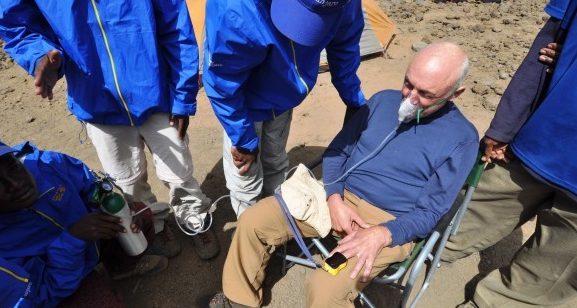
In emergency situations, such as severe Acute Mountain Sickness (AMS), oxygen masks may be administered to alleviate symptoms and facilitate a safe descent to lower altitudes. For conditions like High Altitude Cerebral Edema (HACE) or High Altitude Pulmonary Edema (HAPE), quick descent is crucial. While oxygen can provide temporary relief, either avoiding higher altitudes or descending is the safest approach for those experiencing symptoms.

The Western Breach Exception – Supplemental Oxygen

An exception applies when climbers tackle the Western Breach route, where descent is challenging and stretcher evacuation isn’t feasible. In such cases, oxygen (and/or dexamethasone) might be provided to assist climbers in ascending to the crater rim, followed by a swift descent via Stella Point.

Kilimanjaro vs. Everest Oxygen Use

While Everest climbers use oxygen in the “death zone” above 26,000 ft, this practice isn’t suitable for Kilimanjaro. Using oxygen on Kilimanjaro might mask altitude sickness symptoms and disrupt natural adaptation. Acclimatization on Kilimanjaro occurs gradually and requires a slow ascent, staying hydrated, and considering longer routes for better acclimatization protocols.

Final Considerations – Supplemental Oxygen

When approaching Kilimanjaro, it’s vital to prioritize safety and the genuine accomplishment of reaching its summit. Rather than relying on supplemental oxygen, focus on acclimatization techniques, consulting with medical professionals, and ensuring optimal physical condition to truly embrace the journey.

If you liked our post Kilimanjaro: Do I Need Supplemental Oxygen to Climb?, you might also like to read our Altitude Sickness and Acclimatization on Kilimanjaro

Climbing Mount Kilimanjaro: Understanding Timeframes and Routes

If you’re dreaming of climbing Kilimanjaro, the question of how long the journey takes is likely on your mind. The duration of your climb depends on various factors, but let’s break it down to help you plan your ascent effectively.

Timeframe for Climbing Kilimanjaro

The time it takes to climb Mount Kilimanjaro varies based on the route you choose and your acclimatization process. On the longer routes, the journey to the summit, Uhuru Peak, and the descent to the finishing point can span from five to nine days. Spending more days on the mountain enhances your chances of summiting successfully and reduces fatigue.

It’s important to note that trekkers who opt for a shorter 5-day climb tend to have the lowest success rate, while those who allocate 8 or 9 days have significantly higher odds of reaching the Roof of Africa.

Factors Influencing Duration

  1. Acclimatization: How well your body adjusts to the altitude significantly affects your climb’s duration. Gradually adapting to the lower oxygen levels is essential to prevent altitude-related issues.
  2. Ascent Rate: According to the Wilderness Medical Society, controlling the rate of ascent is crucial for preventing altitude illness. A steady pace allows your body to acclimatize effectively.
  3. Route Choice: There are six different routes to Kilimanjaro’s summit. The shortest options, like Marangu and Umbwe, can be completed in 5 days, while the longer treks, such as Lemosho, Machame, Rongai, or Northern Circuit, span 6-10 days.
  4. Physical Fitness: While fitness makes the trek easier, it doesn’t guarantee better acclimatization. Even fit individuals need time to adapt to altitude.
  5. Descent Duration: Descending from Uhuru Peak to the finish point usually takes about two days. The descent varies from 4 to 6 hours, depending on the route and your experience.

Choosing the Right Duration for Climbing Kilimanjaro

Selecting a longer route provides the essential advantage of proper acclimatization, increasing your summit success rate. It also reduces the risk of fatigue and injuries. Longer treks like Lemosho, Machame, Rongai, or Northern Circuit allow your body to adjust gradually, enhancing your enjoyment of the journey and safety.

It’s worth noting that elite athletes have set impressive records for summiting Mount Kilimanjaro. For instance, Karl Egloff from Switzerland holds the record at 4 hours and 56 minutes. Therefore showcasing what remarkable feat elite climbers can achieve!

In conclusion, while it’s possible to complete Kilimanjaro’s ascent in 5 or 6 days, choosing a longer route enhances your safety and chances of success. Carefully considering factors like acclimatization, physical fitness, and route choice will help you make an informed decision and fully embrace this extraordinary adventure.

If you liked our blog post Climbing Kilimanjaro: Understanding Timeframes and Routes, you might also like to read Kilimanjaro: Do I Need Supplemental Oxygen to Climb?.

Vaccinations and Health Measures for Tanzania Travel

Vaccinations and Health Measures for Tanzania Travel

When embarking on a journey to Tanzania, safeguarding your health is of paramount importance. Here’s an informative guide on the Health Measures & Necessary Vaccinations to take for a safe and enjoyable trip to Tanzania.

Recommended Vaccines and Preventive Health Measures

Before traveling to East Africa, it’s crucial to understand the recommended vaccines and preventive measures. To determine which vaccinations are essential for your trip, consult a healthcare provider who can assess your travel plans and personal health.

  • Hepatitis A: Protect yourself from hepatitis A virus, which can spread through person-to-person contact or contaminated food and water.
  • Hepatitis B: Consider this vaccine if you may encounter blood or body fluids, have sexual contact with locals, or receive medical treatment.
  • Malaria: Given the high risk in East Africa, including cities, consult your healthcare provider for a prescription antimalarial drug.
  • Meningococcal Vaccine: If visiting during December through June, consider vaccination if epidemics of meningococcal disease occur in the region.
  • Rabies: If exposed to rural outdoor environments, pre-exposure vaccination is advisable.
  • Typhoid Vaccine: Guard against typhoid fever, contracted through contaminated food or water.
  • Yellow Fever: If traveling to endemic areas, vaccination is recommended and may be required for international border crossings.
  • Tetanus-diphtheria, Measles, and Polio: Check for booster doses as needed.

Malaria Prevention

Malaria poses a serious risk in East Africa. Protect yourself by seeking prescription antimalarial drugs from your healthcare provider. Choose from options like atovaquone/proguanil, doxycycline, mefloquine, or primaquine under special circumstances.

Yellow Fever – Health Measures

For entry into Tanzania from countries with yellow fever presence, such as Kenya, a yellow fever vaccination certificate is mandatory.

Food and Waterborne Diseases – Health Measures

Guard against food and waterborne diseases by ensuring the safety of your food and drinking water. These illnesses, stemming from viruses, bacteria, or parasites, are a primary cause of traveler discomfort. Safeguard against infections such as E. coli, Salmonella, cholera, and typhoid fever.

COVID-19 Measures

As of September 15, 2022, air travelers to Tanzania are exempt from vaccination and testing requirements for COVID-19. However, land border crossings necessitate specific measures:

  • Fully vaccinated travelers arriving via land borders are exempt from COVID-19 test requirements, provided they present valid vaccination certificates.
  • Unvaccinated or incompletely vaccinated travelers must show a negative PCR test taken within 72 hours before entering Tanzania through land borders. They may also need a Rapid Antigen Test on arrival.

Ebola Precautions

Though you might have heard about Ebola outbreaks in Africa, the risk of exposure to Ebola while in Tanzania is currently zero. Previous outbreaks were distant and isolated, occurring in West Africa. The virus transmits through direct contact with infected body fluids, posing minimal risk to tourists.

In Conclusion

Prioritizing your health is crucial while preparing for a Tanzanian adventure. By following recommended vaccinations, antimalarial medications, and preventive measures against diseases, you can fully enjoy your journey while staying safe and well.

If you liked our blog post Vaccinations and Health Measures for Tanzania Travel, you might also like to read Climbing Mount Kilimanjaro: Understanding Timeframes and Routes.

How to Get to Moshi

Moshi, a picturesque town nestled on the slopes of Mount Kilimanjaro in northern Tanzania, is a destination worth exploring. If you’re planning a visit, here’s a detailed guide on how to get there:

The Best Route: Kilimanjaro International Airport (JRO) – How to Get to Moshi

The most convenient way to reach Moshi is by flying into Kilimanjaro International Airport (JRO). Airlines like KLM/Kenya Airways, Ethiopian, and Condor operate here. Once you land at JRO Airport, we offer a private transfer to Moshi for $50 one way.While tickets to Kilimanjaro Airport might be a bit pricier compared to flights to Nairobi or Dar es Salaam, it’s a cost-effective choice considering the time saved on bus travel, domestic flight expenses, Kenyan visa costs (if flying to Nairobi), and the potential savings of avoiding two hotel nights in Nairobi or Dar es Salaam.

Arrive Early for Your Trek or Safari – It’s a good idea to arrive at least one day prior to your Kilimanjaro trek or safari departure. This buffer day allows you to settle in and acclimate to the new environment.

Other Airports and Travel Options

  • Dar es Salaam (DAR):

Buses between Dar es Salaam and Moshi are priced at approximately $50 per person for a one-way trip, taking around 8 hours. Morning departures are available. Alternatively, domestic flights take around 1 hour, costing about $240 one way. Secure hotel options in Dar es Salaam range from $70 to $150 for a double room. We’re here to assist you with hotel bookings and transportation to/from Dar es Salaam.

  • Nairobi (NBO):

For traveling between Nairobi and Moshi, flight options are available through Kenya Airways and Precision Airways.  Moreover, we can easily book these flights online.

The “Riverside” bus shuttle connects Nairobi and Moshi, charging $40 per person each way for a journey of about six hours. The shuttle departs Nairobi at 8 am daily. Arrive 30 minutes early for luggage loading. The shuttle halts at the Tanzanian border for immigration and customs checks; a visa is required to enter Tanzania. Although the route might be a bit bumpy due to ongoing construction, it offers an authentic African experience. The shuttle also stops in Arusha for a shuttle switch and lunch. Feel free to bring your own snacks and drinks for the ride.

Additionally, a private car option is available from Nairobi to Moshi. This car accommodates 7-8 people, or you can choose a mini-bus for 20-25 passengers. You decide the pickup time and location, and we handle the transportation arrangements. The cost for a 7-8 person car is approximately $500 one way.

  • Mombasa (MBA):

Flights to/from Mombasa are around $150.

  • Zanzibar (ZNZ):

If your Tanzanian journey concludes in Zanzibar, you can find international flights to/from Zanzibar. Domestic flights between Zanzibar (ZNZ) and Kilimanjaro (JRO) are approximately $240 one way per person.

If your travels take you to Kenya, keep in mind that the visa costs are at least $50 per person.

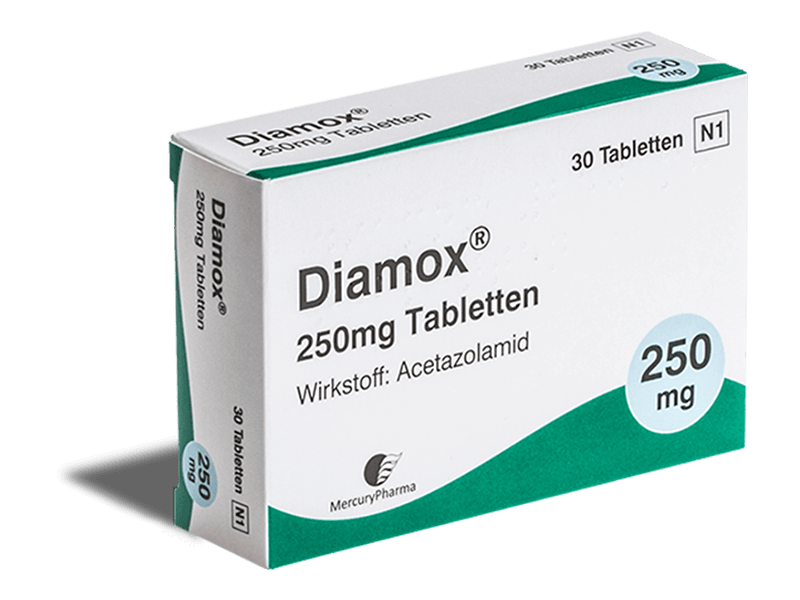
If you liked How to Get to Moshi, you might also like our Should you use Diamox while Climbing Kilimanjaro.

Should you use Diamox while Climbing Kilimanjaro

If you like mountaineering, you’ve probably heard about Diamox. Let’s discuss its use and benefits!

Kilimanjaro’s peak stands at an impressive 19,341 feet above sea level, categorized as “extreme altitude.” Unlike Everest, supplemental oxygen isn’t necessary to conquer Uhuru Peak safely.

However, the threat of altitude sickness and related complications looms large, often causing climbers to turn back or fail to reach the summit. Altitude sickness can affect even the fittest hikers. While gradual acclimatization is ideal, allowing your body to adjust slowly, a medication called Diamox can facilitate this process.

Note: This article and its information are not meant to diagnose, treat, prevent, or cure any condition. It’s essential to consult your healthcare professional before considering any suggestions here.

What is Diamox?

Diamox, or acetazolamide, is commonly used to treat glaucoma, certain forms of epilepsy, and edema resulting from heart failure or drug-induced causes.

In the climbing community, it’s utilized to expedite acclimatization during a well-planned ascent.

This oral prescription medication requires a doctor’s consultation to determine its suitability for you. Individuals with pre-existing conditions or kidney and liver issues may find it unsuitable.

According to the Wilderness Medical Society, Diamox can notably reduce the occurrence and severity of altitude sickness by hastening the body’s adaptation mechanisms. Several studies confirm that when combined with proper acclimatization practices, trekkers who take low doses of this medicine are less likely to develop mountain sickness, and if they do, its impact is generally milder.

Diamox doesn’t cure altitude sickness; it’s used as a preventive measure.

How Does Diamox Work?

Acetazolamide, a sulfonamide medication, prompts the kidneys to eliminate bicarbonate. This action re-acidifies the blood, tricking the body into believing there’s an excess of carbon dioxide. This acts as a respiratory stimulant. The diuretic effect leads to increased urination, while the breathing stimulation helps counter the periodic breathing pattern during sleep.

Taking this medicine leads to deeper breathing and more frequent urination.

Side Effects & Interactions of Diamox

Climbers often report these main side effects:

  1. Increased Urination: Diamox’s diuretic nature requires maintaining hydration to balance its effects.
  2. Altered Taste Sensations: In some cases, certain foods or drinks might taste different.
  3. Tingling or Numbness: Typically experienced in the hands, feet, or face.
  4. Nausea and Gastric Disturbance: Dizziness and confusion are rare but can be ruled out with a trial dose.
  5. Interaction with Other Medications: Diamox can interact with existing medications. Checking labels and consulting a doctor is advised.

Dosage of Diamox on Kilimanjaro

As recommended by the Wilderness Medical Society, a dosage of 125mg twice daily is suggested, starting two days prior to your climb’s commencement. Dr. Peter Hackett from the Institute for Altitude Medicine supports this recommendation. Some individuals find half this dosage effective as a prophylactic measure.

Debunking Diamox Myths

Myth: Diamox masks altitude sickness symptoms.

Reality: It accelerates natural acclimatization and doesn’t conceal symptoms.

Myth: Diamox ensures freedom from altitude sickness.

Reality: Altitude sickness can still occur, but Diamox aids acclimatization.

Myth: Diamox prevents altitude sickness from worsening.

Reality: It won’t protect you from mountain sickness if you’re already symptomatic.

Myth: Diamox is essential for Kilimanjaro summit.

Reality: Many climbers summit safely without it.

Myth: Using Diamox is cheating.

Reality: It accelerates natural acclimatization, increasing summit success chances.

Myth: Stopping Diamox worsens symptoms.

Reality: Discontinuing it doesn’t worsen acclimatization.

Should You Use Diamox?

Consult your physician for personalized advice. If allergic to sulfa medications, avoid it. Taking unnecessary medication is a personal choice; some climbers opt for it to maximize elevation performance, while others prefer natural methods.

With your doctor’s approval, consider a 2-4 day trial of Diamox before your Kilimanjaro journey to identify any side effects and avoid confusion with altitude sickness.

Alternative Acclimatization Approaches

Natural remedies claim various benefits, but Diamox remains the only consistently tested medication.

A few common alternatives include Gingko Biloba, Coca leaves, Beetroot, and Garlic. Remember that consistent scientific evidence is lacking for these options.

Note About Ibuprofen

For minor pain relief, ibuprofen is preferable on Kilimanjaro. Consult your guide before taking it, as it might mask early altitude sickness symptoms.

Malarone and Malaria Awareness

Though mosquitos are rare above 6000ft on Kilimanjaro, malaria risk exists in areas like Moshi or Arusha.

Talk to your doctor about antimalarial prophylaxis, like Malarone, with minimal side effects. Prophylaxis doesn’t guarantee immunity; precautions like mosquito repellents, nets, and clothing are crucial.

Closing Thoughts

Acclimatization is key. Opt for a longer route and pace yourself. Stay hydrated, and if you choose Diamox, adjust water intake accordingly. Promptly notify your guide of any discomfort.

Still have questions? Reach out for guidance in selecting your route or planning your Tanzanian adventure.

If you liked this article, you might also like our How to Get to Moshi.

Kilimanjaro Trek Park Fees: A Detailed Guide

If you’re a mountaineer lover, here is our detailed guide on Kilimanjaro Trek Park Fees. Find out what to expect on this extraordinary mountain adventure.Embarking on a Mount Kilimanjaro expedition involves costs, with a significant portion attributed to fees payable to the Kilimanjaro National Parks Authority (KINAPA), the overseeing body of the park. These fees contribute to around 75% of the overall trek expenses, making them a crucial aspect to understand. In this article, we’ll delve into these fees, explain their components, offer insights on fee calculation, highlight discounts available, and provide valuable information about the payment process.

A Quick Glance at Fees for Different Routes – Kilimanjaro Trek Park Fees

The following outlines the fees inclusive of both charges and taxes for different routes:

  • Machame 6 days: $814.20 per person
  • Machame 7 days: $955.80 per person
  • Lemosho 7 days: $955.80 per person
  • Lemosho 8 days: $1097.40 per person
  • Marangu 5 days: $719.80 per person
  • Marangu 6 days: $873.20 per person
  • Rongai 6 days: $814.20 per person
  • Rongai 7 days: $955.80 per person
  • Umbwe 6 days: $814.20 per person
  • Umbwe 7 days: $955.80 per person
  • Northern Circuit 8 days: $1097.40 per person
  • Northern Circuit 9 days: $1239.00 per person

Understanding the Fee Components – Kilimanjaro Trek Park Fees

The fees comprise different elements, with their calculations dependent on the number of days and nights spent within the park. Let’s delve into the main constituents:

Conservation Fees – These fees contribute to the preservation of the national park. Each day in the park incurs a fee of $70. To illustrate, a 7-day Lemosho route would involve conservation fees amounting to $490 ($70 x 7 days).

Camping Fees – Most routes entail camping at designated sites, complete with restroom facilities. A nightly camping fee of $50 is applicable. For instance, camping over 6 nights on a 7-day Lemosho trek would equate to $300 ($50 x 6 nights).

Hut Fees – The Marangu route involves hut accommodations instead of tents. You’ll be charged $60 for each night spent in a hut. On a 5-day Marangu route, the total hut fees would sum up to $240 ($60 x 4 nights).

Rescue Fees – In case rescue services are necessary, these fees cover associated expenses. The rescue fee amounts to $20 per trekker for each trek.

Crater Camping Fees – Opting to camp within the crater incurs an additional cost of $100 per trekker per night.

Guide and Porter Entrance Fees – Entrance fees for guides, cooks, and porters must also be covered. The fee stands at $2 per person in the group.

Value Added Tax (VAT) – A government-imposed Value Added Tax (VAT) of 18% is applicable to all mentioned fees.

Calculating the Fees

Now, equipped with an understanding of the fee components, you can perform fee calculations with ease. Consider two examples:

Example 1: 6-day Machame route

  • Conservation fees: $70 x 6 days = $420
  • Camping fees: $50 x 5 nights = $250
  • Rescue fees: $20
  • Total (before taxes): $420 + $250 + $20 = $690
  • VAT (18%): $124.20
  • Total (including taxes): $690 + $124.20 = $814.20

Example 2: 5-day Marangu route

  • Conservation fees: $70 x 5 days = $350
  • Hut fees: $60 x 4 nights = $240
  • Rescue fees: $20
  • Total (before taxes): $350 + $240 + $20 = $610
  • VAT (18%): $109.80
  • Total (including taxes): $610 + $109.80 = $719.80

Payment of Fees – Kilimanjaro Trek Park Fees

The prices presented upon inquiry encompass all fees and taxes, ensuring a transparent cost structure. Rest assured, we handle fee payment to the park and acquisition of the required permits on your behalf.

Available Discounts

Specific groups can benefit from park fee discounts, including children, Tanzanian residents, and citizens of East African countries.

  • Children aged 5-15: Reduced fees for conservation and camping. Hut and rescue fees remain standard.
  • Children under 5: No conservation or camping fees. Hut and rescue fees apply.
  • Residents/Expatriates: Tanzanian residents receive discounted conservation fees; other fees remain unchanged.
  • East African Citizens: Discounts available for citizens of Tanzania, Kenya, Uganda, Burundi, Rwanda, and South Sudan. Proof of citizenship via passport is required.

In Summary

Our prices align with the park’s stipulated fees, without any hidden extras. When exploring our website, the displayed prices include all fees and taxes, ensuring complete transparency about the overall cost.

Important Update

As of October 2018, direct payment of fees at the park gate on the trek’s first day is no longer feasible. Only authorized tour operators can make payments via the online system.

If you liked our Kilimanjaro Trek Park Fees: A Detailed Guide, you might also like to read our Training for Climbing Kilimanjaro.

Training for Climbing Kilimanjaro

If you’re a mountaineering lover, jump to read this very useful guide on Training for Kilimanjaro Climbing. Here is an important info on how to increase summit success rate and become Kilimanjaro hero! Embarking on a journey to conquer Kilimanjaro demands meticulous preparation. The challenge’s intensity can vary based on factors such as altitude, hiking experience, and individual fitness levels. In this comprehensive guide, we’ll delve into the intricate details of how to effectively train for your Kilimanjaro expedition, ensuring you’re equipped to tackle the summit with confidence and determination.

Keys to a Successful Climb – Training for Kilimanjaro Climbing

To achieve success on Kilimanjaro, a multifaceted approach is necessary. Acclimatization, the process of adapting to higher altitudes, plays a pivotal role. The number of days you allocate to acclimatize significantly influences your chances of successfully reaching the summit. It is strongly advised to dedicate a minimum of 8-9 days to your Kilimanjaro ascent, preferably opting for the Lemosho or Northern circuit route.

Furthermore, tapping into the firsthand experiences of seasoned Kilimanjaro climbers is invaluable. Their insights into effective preparation can help you navigate the challenges and maximize your safety and success. Additionally, the guidance and support of an experienced and capable crew are paramount for a smooth and rewarding journey on the mountain.

pAre You Training Effectively?

  • Assess Your Current Fitness Level: Begin by evaluating your existing training routine. If you’re currently training 3-4 days a week, it’s imperative to gradually elevate your training frequency to 6 days a week. Focus your efforts on endurance training, strength-building exercises, and targeted preparation for downhill hiking.
  • Evaluate Training Facilities: Consider the availability of suitable training facilities in your vicinity. Access to hills, tall buildings, a 30% incline treadmill, or a stairmaster can greatly enhance your training regimen.
  • Optimize Heart Rate Zones: Structure your training plan to encompass a minimum of 10 hours per week, with a specific focus on training within the appropriate heart rate zones to achieve optimal results.

Mountain-Specific Training – Training for Kilimanjaro Climbing

Climbing Kilimanjaro necessitates specialized training tailored to replicate the unique conditions of the mountain. Mere running won’t suffice as preparation. Concentrate your efforts on mountain-specific training, involving rigorous uphill and downhill hikes while carrying a weighted backpack. This approach closely mirrors the demands you’ll face during the climb.

Strive to allocate approximately 70% of your training time to movements that simulate the challenges of mountain trekking. The ascent to the summit entails traversing terrain with steep 30-degree angles, underscoring the importance of training for both uphill and downhill scenarios.

Consistency is Key – Training for Kilimanjaro Climbing

The key to success lies in maintaining a consistent training routine. Aim to engage in 5-6 training sessions per week, interspersed with longer hikes on your rest days. As you approach the summit push, focus on ascending roughly 200m/656 feet per hour. In the final stages of your training, aim to achieve an ascent of 500m/1,650 feet within 1 hour 30 minutes while carrying a weighted backpack.

Long Hikes and Stamina Building

Gradually build your stamina by progressively engaging in long-distance hill walks that span 5 or more hours, encompassing an ascent and descent of 1,000m/3,380 feet. If topographical constraints limit your access to hilly terrain, seek out tall buildings or staircases to simulate uphill and downhill movement with a weighted backpack.

Mental Preparation>

Cultivating mental resilience is just as vital as physical conditioning. Gradually pushing your training boundaries helps build your capacity to endure the stresses and strains that accompany mountain climbing. Familiarize yourself with your gear, including your trekking boots, sleeping bag, and backpack. Camping excursions can provide valuable experience and increase your comfort level.

Maintaining a Positive Mindset – Training for Kilimanjaro Climbing

A positive mindset is an indispensable asset when embarking on a challenge like climbing Kilimanjaro. It’s important to remember that countless individuals have triumphed over the same journey, and with the right attitude and preparation, you can join their ranks. Anticipate setbacks, prepare for the physiological adjustments demanded by high altitudes, and draw inspiration from the encouragement provided by our experienced guides throughout the expedition.

Multi-Day Training for Endurance

Prioritize multi-day training to familiarize yourself with the physical demands of sustained hiking. Once-a-week hill walks may fall short of adequately preparing you for the multiple hours of daily trekking required on Kilimanjaro. It’s imperative to acclimate your body to the rigors of walking for extended periods while carrying a backpack laden with essentials such as water, spare clothing, rain gear, snacks, a camera, a medical kit, valuables, and sunblock.

Preparedness is Key

Consider the significant investment you’ve made in your Kilimanjaro endeavor, encompassing gear, travel expenses, and the climb itself. This investment demands a proportional commitment to your training. Additionally, as a participant in a group climb, it’s essential to consider the collective experience. Prioritize your preparation to ensure you don’t compromise the journey for yourself or others due to inadequate training. Respecting the mountain, your fellow climbers, and our dedicated team on the ground entails coming prepared and dedicated.

Allow Time for Comprehensive Conditioning

Avoid last-minute rushes by initiating your training plan well in advance of your departure date. Building strength, stamina, and fitness requires a dedicated timeframe, which typically spans 4-8 months, contingent on your starting point. Adequate time for preparation is pivotal in minimizing the risk of injury.

Balanced Nutrition

Nutrition serves as a foundational pillar of your preparation. A well-balanced diet is integral to sustaining optimal health and performance. As you intensify your training regimen, your body’s demand for carbohydrates increases. Ensuring that your body receives the necessary fuel through thoughtful nutritional choices is crucial for maintaining your training progress.

Diversify Your Training Regimen

To enhance your overall fitness and performance, embrace diversity in your training regimen. While hill walking and stair climbing are pivotal components, expanding your activities can yield well-rounded benefits. Incorporating activities such as jogging, cycling uphill, yoga, stretching, and weight training can contribute to improved core stability and overall fitness.

Customized Approach for Maximum Results – Training for Kilimanjaro Climbing

It’s important to acknowledge your individuality in the training process. A customized approach, tailored to your specific fitness level and objectives, is paramount. Seeking guidance from personal trainers, gym instructors, or joining hiking clubs can provide valuable support. We’re here to offer guidance and advice, ensuring your training aligns with your goals and enhances your chances of a successful Kilimanjaro climb.

In Conclusion

Training for Kilimanjaro is a comprehensive endeavor that demands dedication, perseverance, and strategic planning. Acclimatization, specialized mountain training, mental preparation, and a positive mindset are all critical components. Prioritize consistent training, embrace multi-day hikes, and approach your preparation with a long-term perspective. As you stand at the threshold of this awe-inspiring adventure, remember that your success on Kilimanjaro hinges on the groundwork you lay through rigorous and well-structured training. With careful preparation, you can conquer the summit and create memories that will last a lifetime.

If you liked Training for Kilimanjaro Climbing, you might also like our Kilimanjaro Trek Park Fees: A Detailed Guide.

What Do You Need to Carry on Mount Kilimanjaro?

If you’re a brave mountaineer and adventure lover, read below what to expect and carry on Mount Kilimanjaro!

When gearing up for your Mount Kilimanjaro adventure, you’re responsible for carrying the items you’ll need during the day before you reach your next campsite. Our skilled porters will take care of carrying your other belongings. A backpack with a volume capacity of around 30 liters (2000 cubic inches) works well – not too big, not too small.

Climbers should prepare their daypacks or backpacks, while other belongings go in a duffel bag for the porters to handle. Your daypack’s contents should be tailored to your daily needs.

The rule of thumb is to carry only what’s necessary for the day. For instance, you don’t need cold weather gear in the rainforest. Likewise, bug spray isn’t relevant at higher elevations.

Essential Items for Your Day Pack on the Kilimanjaro Trek – What to Carry on Mount Kilimanjaro

Once you’re equipped with your complete trekking attire, including a hat, shirt, underwear, hiking pants, socks, and boots, let’s explore what you should pack in your daypack.

Protection from the Elements:

  • Sunglasses for eye protection
  • Buff or Neck Gaiter (optional)
  • Warm Knit Hat
  • Soft Jacket (fleece or soft-shell)
  • Waterproof Jacket (breathable with hood)
  • Thin Gloves
  • Waterproof Pants (breathable)
  • Trekking poles (optional, but recommended, especially for the summit)

Hydration and Energy:

  • Water Bottle (Nalgene, 32 oz.)
  • Water Bladder (Camelbak type, 3 liters)
  • Snacks (lightweight, high calorie, high energy – optional)
  • Electrolytes (powder or tablets – optional)

Essential Miscellaneous:

  • Camera (with extra batteries – optional)
  • Lip Balm
  • Sunscreen
  • Hand Sanitizer
  • Toilet Paper
  • First Aid Kit
  • Various Bags

These items form the core of what you’ll need in your daypack. Keep in mind that specifics might change based on factors like travel time to camp, terrain, weather conditions, and your personal requirements.

Feel free to consult your guide if you’re unsure about your packing choices. Their expertise ensures you’re well-prepared for your Kilimanjaro expedition.

How to Pack Your Day Pack Effectively – What to Carry on Mount Kilimanjaro

For an organized daypack, avoid haphazardly tossing items, risking them falling out or getting lost. Instead, use a strategic approach by using plastic bags, dry bags, or stuff sacks to categorize and secure your belongings. For instance, group small bottles like prescriptions, sunscreen, lip balm, and hand sanitizer within a zip-lock bag. Similarly, organize snacks in a separate bag, while clothing accessories like hats, gloves, and neck gaiters can go into a stuff sack.

Balancing the load is key

Place heavier items, such as water bottles, near your back’s center to maintain balance aligned with your spine. Avoid unevenly placing heavy items, which could lead to awkward tilting. If available, use compression straps to secure items and prevent shifting as you walk.

Consistency is crucial

Keep your items in the same spots, whether in the main compartment, side pockets, or pant pockets. This ensures easy access without searching for essentials.

If you liked our What Do You Need to Carry on Mount Kilimanjaro, you might also like to read our Toilets on Kilimanjaro: What to Expect.

What Belongs in Your Duffel Bag – What to Carry on Mount Kilimanjaro?

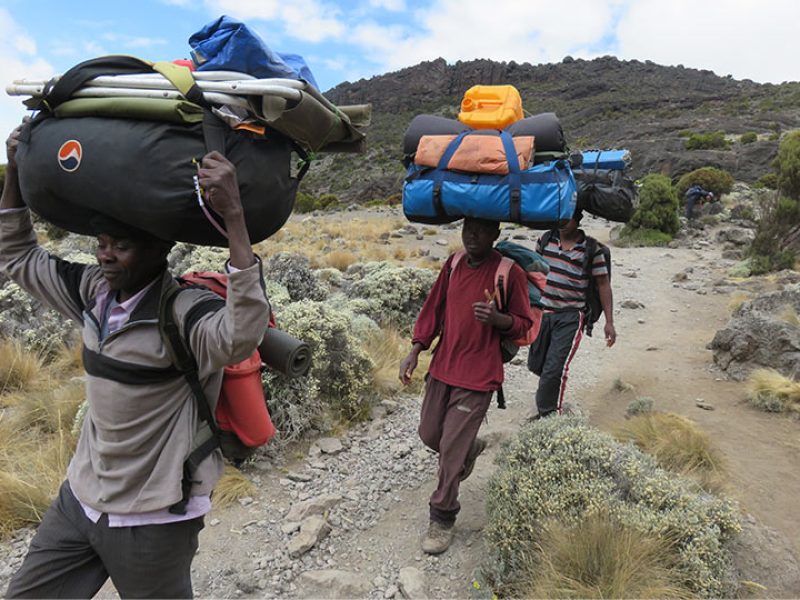
All items that don’t go in your daypack should be packed in your duffel bag.Porters will carry your duffel bag between campsites. As climbers set off in the morning, porters remain behind to pack up tents and tidy the campsite. They then move ahead, reaching the next campsite ahead of climbers. Here, they set up camp, cook, and provide water. Climbers generally reconnect with their porters at the next overnight stop, accessing their belongings carried by the porters only at day’s end.

The duffel bag weight limit, set by Kilimanjaro park authorities, is 15 kilograms. Use plastic bags or dry bags to keep belongings organized and dry. While a backpack is acceptable, porters prefer duffel bags due to how they carry loads on their heads, making duffel bags more suitable for the journey.

Toilets on Kilimanjaro: What to Expect

Here is our guide to Toilets on Kilimanjaro. Read the text provided below and find out everything you need to know.In the realm of using restrooms, our expectations are usually centered around comfort and privacy. However, the scenario shifts when you embark on a trek up Mount Kilimanjaro. This article will provide insights into the available toilet facilities on the mountain, spanning from basic campsite setups to options for private portable toilets.

Navigating the Call of Nature – Toilets on Kilimanjaro

First and foremost, let’s ease your concerns. There are public toilets at every campsite along the Kilimanjaro route. Yet, it’s essential to adjust your expectations. Leave aside thoughts of porcelain commodes with lockable doors and sinks equipped with soap dispensers. Picture instead a wooden structure (often lacking a door, let alone a lock) enclosing a deep hole in the ground.

Prepare yourself for squatting and minimal privacy. Although the Kilimanjaro National Park team diligently maintains these facilities, the task is challenging due to the sheer number of climbers using them. Consequently, the odor emanating from Kilimanjaro’s communal ‘long drop’ toilets can be potent, making the experience rather unpleasant and unsanitary.

Is a Private Toilet an Option?

Indeed, we offer “portable private toilets.” These are fully equipped chemical toilets enclosed within their own discreet tent for complete privacy (although not necessarily soundproof). These portable restrooms are reserved exclusively for your group’s use and are set up and accessible solely at the campsite.

The porters, responsible for cleaning, upkeep, and transportation, ensure that your restroom breaks remain hygienic and private.

Addressing Mid-Trek Bathroom Needs – Toilets on Kilimanjaro

For minor needs like urination, a practical solution is to find a private spot behind a tree or bush for a brief moment. Informing your guide can help prevent any awkward encounters. As you ascend beyond the tree line, finding suitable cover becomes more challenging. Larger shrubs may offer privacy, and if not, boulders or rock formations could serve as alternatives.

A more effective strategy is carrying a container to empty at the next campsite. Specialized products like Shewee for women and Peebol for everyone, available on platforms like Amazon, serve this purpose. “Personal toilet” kits designed for events like festivals can also work well for Kilimanjaro treks. Having a container proves useful during the day’s hike and nighttime when leaving the campsite is less appealing.

Dealing with Defecation on the Trail

For defecation needs, locate a secluded area as discussed earlier. Leaving waste behind is unacceptable. Disposable plastic bags can be carried for waste collection. Additionally, having toilet paper and hygienic wet wipes for cleanup is crucial.

Remember: Proper disposal is key. After cleaning up, place everything in a plastic bag (consider using double bags), secure it tightly, and take it to the next campsite. The porters will handle it from there.

How Does a Long Drop Toilet Function?

A long drop toilet, also known as a pit latrine, collects human waste in an underground hole beneath the toilet. It can operate with or without flowing water. The design aims to reduce disease spread and the transfer of pathogens by flies.

Extending the Long Drop

The maximum depth for a long drop toilet’s hole is 1 meter from the ground level. Once the hole is filled up to 330mm, you’ll need to dig a new one. After filling, it’s essential to cover the long drop with soil completely.

If you liked our Toilets on Kilimanjaro: What to Expect, you might also like our What Do You Need to Carry on Mount Kilimanjaro?